Saturday, 15 January 2022

ATL PS17Numpad


VIA 

1. Download VIA software here
 
win platform
 other platforms


2. Download json file below
17(R) json file


3. Install VIA, click File, import keymap. Choose the json file you downloaded in step2
File>import keymap or ctrl+o


4. You can now start remapping in VIA. You dont need to save, it is real time mapping.  


Updates

###PS17SCM_via(R).json update 20211007
- Fixed reverse rotation
- No more physical reset button

###PS17SCM_via.json update
- Layers available from 0 to 6 (total of 7)
- Layer light indicator for numlock, /, *, - row
- CUSTOM label for knob (alt tab to cycle between windows; move window left n right for multiple screen users; alt mswheel up down for design software)

Wednesday, 12 January 2022

Render keymap status for oled


 Inspired from treadstone48

Only found this under keymap.c

following all under  #ifdef OLED_DRIVER_ENABLE

PART 1

static inline void update_keymap_status(void) {

  snprintf(layer_status_buf, sizeof(layer_status_buf) - 1, "OS:%s Layer:%s\n",
    keymap_config.swap_lalt_lgui? "win" : "mac", get_leyer_status());
}

static inline void render_keymap_status(void) {

  oled_write(layer_status_buf, false);
}


#define UPDATE_KEYMAP_STATUS() update_keymap_status()

static inline void render_status(void) {

  UPDATE_LED_STATUS();
  RENDER_LED_STATUS();
  render_keymap_status();
  UPDATE_LOCK_STATUS();
  RENDER_LOCK_STATUS();
  RENDER_KEY_STATUS();
}


//

 https://javl.github.io/image2cpp/


Sunday, 9 January 2022

Simple setup of zmk wireless (keymap)


The board is tested and can be typed for left and split through wireless connection. But connecting it to your pc can be tricky. Do proceed with PART A when you receive your corne wireless build.

PART A

To connect to your pc

1. LWR+BTCLR (means clear previous bluetooth, you always have to clear if you reset your board)

2. LWR+BT1 (means bluetooth profile 1)

3. For windows platform, START>Bluetooth & other devices

4. + Add Bluetooth or other device > Bluetooth > Corne should be appeared in the list

5. Connect and done. Test if left and right are responding. If not proceed with the following steps:


PART B

Flash wirelss / zmk

1. Connect left and right splits to your pc (both connect together using type c cable)

2. Put right into bootloader mode (press the reset button), one window is popped out showing "nicenano" folder. Dont do anything yet, remember this folder as right split. 

3. Now press reset button on your left split, one window will be popped out as previous step. 

4. Drag corne_right_u2f to right split nicenano folder, the window will be closed once you dragged the u2f file in.

5. Do not disconnect right split yet. 

6. Now drag corne_left_u2f file to the remaining nicenano folder

7. (this part is a bit tricky, i forgot how i did it, trial and error please)

7a.  Both of your splits are still connecting to your pc. On your left split, do steps in PART A. If successfully connected, remove left split, then right split. Check if left and right are responding and can type properly (fail if right is not responding). If yes, this method works. Else:

7b. If step 7a cant work. Repeat PART B1-6. Detach right split from your pc. Follow PART A for left split. Once Corne is connected to your pc, check whether right split is responding. Hopefully yes!


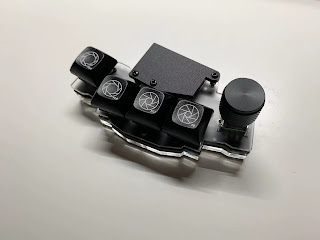
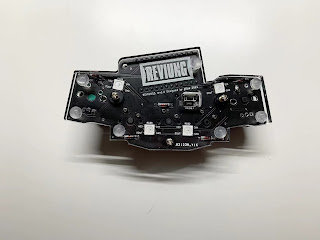
Friday, 3 December 2021

Reviung5 Vial and Via Let's go!


Author: https://github.com/gtips/reviung

Our unit is flashed with via and vial. 
Malaysian buy from here; ships to other countries upon request, contact us through instagram


VIA 

1. Download VIA software here
 
win platform
 other platforms

2. Download json file below
 Json file here (to load in via)

3. Install VIA, click File, import keymap. Choose the json file you downloaded in step2
File>import keymap or ctrl+o
 

 4. You can now start remapping in VIA. You dont need to save, it is real time mapping.
 
 
--

VIAL

1. Download VIAL software here
2. Start remap your keys, scroll wheel or rotary encoder. 
3. Json file is not required in VIAL.
 
Vial for encoder (auto-detected in vial)


Hex file and firmware will be provided for buyer upon request.


Updates
20211214 97% 28012bytes hex file download here
- enabled qmk settings, combo and tap dance for vial
- adds up to 9 layers
- LTO_ENABLE = yes             #to reduce firmware in rules.mk (oversized to 88)
- enabled all rgb


Sunday, 21 November 2021

Treadstone48 and Rhymestone

 Documentation

 
Hex released from author
https://github.com/marksard/qmk_firmware_hex/releases 
 
Hardware from github by author
https://github.com/marksard/Keyboards 

Firmware from github
https://github.com/qmk/qmk_firmware/tree/master/keyboards/treadstone48

Other link from the author
https://scrapbox.io/marksard/Treadstone48

For Treadstone48 + Rhymestone

Advise from author: this directory is written for the above combination. Flash single rhymestone and treadstone48 with the same hex produced from this directory.
 
 
Some notes on split for vial.json
 
2021-11-22
-  Oled only working on master treadstone48; none on rhymestone
-  RGB light only rainbow swirl, rainbow mood, static gradient, rgb test
-  Mousekey and mediakey enabled
-  Via enabled, manual sideload json to remap
 * The firmware size is approaching the maximum - 27830/28672 (97%, 842 bytes free)


or browse the following website by add manual json (does not support firefox browser)
https://remap-keys.app/ 


Treadstone48 only

json file (provided by the author as in 
[Hex released from author
https://github.com/marksard/qmk_firmware_hex/releases])

hex file same as above


Rhymestone only

Rhymestone left and right (use as 30% board)
json file load here 
[Hex released from author
https://github.com/marksard/qmk_firmware_hex/releases])


Saturday, 13 November 2021

Sesame reconfigure

 Task: To check on discord for solution

(

already disabled mousekeys, extra key enable, no console

ISSUE as follow

Compiling: tmk_core/protocol/vusb/vusb.c                                                           tmk_core/protocol/vusb/vusb.c:77:6: error: #error There are not enough available interfaces to support all functions. Please disable one or more of the following: Mouse Keys, Extra Keys, Raw HID, Console
 #    error There are not enough available interfaces to support all functions. Please disable one or more of the following: Mouse Keys, Extra Keys, Raw HID, Console
      ^~~~~
tmk_core/protocol/vusb/vusb.c:81:6: error: #error Mouse/Extra Keys share an endpoint with Console. Please disable one of the two.
 #    error Mouse/Extra Keys share an endpoint with Console. Please disable one of the two.
      ^~~~~
 [ERRORS]


Tuesday, 9 November 2021

1x!Numpad documentation

 Design Notes

-


Tutorial to Remap keys

VIA 

1. Download VIA software here
 
win platform
 other platforms

2. Download json file below

3. Install VIA, click File, import keymap. Choose the json file you downloaded in step2
 
 
 4. You can now start remapping in VIA. You dont need to save, it reflects directly once you assign.


VIAL

1. Download VIAL software here

2. Start remap your keys, scroll wheel and rotary encoder. 
3. Json file is not required in VIAL.


below for advanced user

Firmware Downloads

20211110

Json download (to load it in VIA)
Hex download for backup
Files keymap download

- Ported with VIA and VIAL
- Programmable rotation for scroll wheel and rotary encoder through VIAL
- Enabled all rgb lighting
- Up to 5 layers configuration 
- Oleds inspired from Yampad (shows layer, stats such as num, cap, scr)
- Mousekey enabled
- QMK settings, tap dance, and combo are disabled in VIAL to save storage


20211213

 Hex download here
Check this link to see how to flash the board; remember to save your layout or keymap by SAVE+LOAD > Save Current Layout. Load this saved layout after you flash with the new hex above. Do note that this json file is different from "Json download to load in VIA" above. 

- removed "keep going", replaced with exclamation mark