Saturday, 15 January 2022

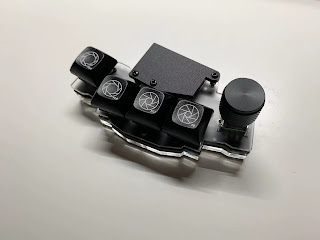
ATL PS17Numpad


VIA 

1. Download VIA software here
 
win platform
 other platforms


2. Download json file below
17(R) json file


3. Install VIA, click File, import keymap. Choose the json file you downloaded in step2
File>import keymap or ctrl+o


4. You can now start remapping in VIA. You dont need to save, it is real time mapping.  


Updates

###PS17SCM_via(R).json update 20211007
- Fixed reverse rotation
- No more physical reset button

###PS17SCM_via.json update
- Layers available from 0 to 6 (total of 7)
- Layer light indicator for numlock, /, *, - row
- CUSTOM label for knob (alt tab to cycle between windows; move window left n right for multiple screen users; alt mswheel up down for design software)

Wednesday, 12 January 2022

Render keymap status for oled


 Inspired from treadstone48

Only found this under keymap.c

following all under  #ifdef OLED_DRIVER_ENABLE

PART 1

static inline void update_keymap_status(void) {

  snprintf(layer_status_buf, sizeof(layer_status_buf) - 1, "OS:%s Layer:%s\n",
    keymap_config.swap_lalt_lgui? "win" : "mac", get_leyer_status());
}

static inline void render_keymap_status(void) {

  oled_write(layer_status_buf, false);
}


#define UPDATE_KEYMAP_STATUS() update_keymap_status()

static inline void render_status(void) {

  UPDATE_LED_STATUS();
  RENDER_LED_STATUS();
  render_keymap_status();
  UPDATE_LOCK_STATUS();
  RENDER_LOCK_STATUS();
  RENDER_KEY_STATUS();
}


//

 https://javl.github.io/image2cpp/


Sunday, 9 January 2022

Simple setup of zmk wireless (keymap)


The board is tested and can be typed for left and split through wireless connection. But connecting it to your pc can be tricky. Do proceed with PART A when you receive your corne wireless build.

PART A

To connect to your pc

1. LWR+BTCLR (means clear previous bluetooth, you always have to clear if you reset your board)

2. LWR+BT1 (means bluetooth profile 1)

3. For windows platform, START>Bluetooth & other devices

4. + Add Bluetooth or other device > Bluetooth > Corne should be appeared in the list

5. Connect and done. Test if left and right are responding. If not proceed with the following steps:


PART B

Flash wirelss / zmk

1. Connect left and right splits to your pc (both connect together using type c cable)

2. Put right into bootloader mode (press the reset button), one window is popped out showing "nicenano" folder. Dont do anything yet, remember this folder as right split. 

3. Now press reset button on your left split, one window will be popped out as previous step. 

4. Drag corne_right_u2f to right split nicenano folder, the window will be closed once you dragged the u2f file in.

5. Do not disconnect right split yet. 

6. Now drag corne_left_u2f file to the remaining nicenano folder

7. (this part is a bit tricky, i forgot how i did it, trial and error please)

7a.  Both of your splits are still connecting to your pc. On your left split, do steps in PART A. If successfully connected, remove left split, then right split. Check if left and right are responding and can type properly (fail if right is not responding). If yes, this method works. Else:

7b. If step 7a cant work. Repeat PART B1-6. Detach right split from your pc. Follow PART A for left split. Once Corne is connected to your pc, check whether right split is responding. Hopefully yes!


Friday, 3 December 2021

Reviung5 Vial and Via Let's go!


Author: https://github.com/gtips/reviung

Our unit is flashed with via and vial. 
Malaysian buy from here; ships to other countries upon request, contact us through instagram


VIA 

1. Download VIA software here
 
win platform
 other platforms

2. Download json file below
 Json file here (to load in via)

3. Install VIA, click File, import keymap. Choose the json file you downloaded in step2
File>import keymap or ctrl+o
 

 4. You can now start remapping in VIA. You dont need to save, it is real time mapping.
 
 
--

VIAL

1. Download VIAL software here
2. Start remap your keys, scroll wheel or rotary encoder. 
3. Json file is not required in VIAL.
 
Vial for encoder (auto-detected in vial)


Hex file and firmware will be provided for buyer upon request.


Updates
20211214 97% 28012bytes hex file download here
- enabled qmk settings, combo and tap dance for vial
- adds up to 9 layers
- LTO_ENABLE = yes             #to reduce firmware in rules.mk (oversized to 88)
- enabled all rgb


Sunday, 21 November 2021

Treadstone48 and Rhymestone

 Documentation

 
Hex released from author
https://github.com/marksard/qmk_firmware_hex/releases 
 
Hardware from github by author
https://github.com/marksard/Keyboards 

Firmware from github
https://github.com/qmk/qmk_firmware/tree/master/keyboards/treadstone48

Other link from the author
https://scrapbox.io/marksard/Treadstone48

For Treadstone48 + Rhymestone

Advise from author: this directory is written for the above combination. Flash single rhymestone and treadstone48 with the same hex produced from this directory.
 
 
Some notes on split for vial.json
 
2021-11-22
-  Oled only working on master treadstone48; none on rhymestone
-  RGB light only rainbow swirl, rainbow mood, static gradient, rgb test
-  Mousekey and mediakey enabled
-  Via enabled, manual sideload json to remap
 * The firmware size is approaching the maximum - 27830/28672 (97%, 842 bytes free)


or browse the following website by add manual json (does not support firefox browser)
https://remap-keys.app/ 


Treadstone48 only

json file (provided by the author as in 
[Hex released from author
https://github.com/marksard/qmk_firmware_hex/releases])

hex file same as above


Rhymestone only

Rhymestone left and right (use as 30% board)
json file load here 
[Hex released from author
https://github.com/marksard/qmk_firmware_hex/releases])


Saturday, 13 November 2021

Sesame reconfigure

 Task: To check on discord for solution

(

already disabled mousekeys, extra key enable, no console

ISSUE as follow

Compiling: tmk_core/protocol/vusb/vusb.c                                                           tmk_core/protocol/vusb/vusb.c:77:6: error: #error There are not enough available interfaces to support all functions. Please disable one or more of the following: Mouse Keys, Extra Keys, Raw HID, Console
 #    error There are not enough available interfaces to support all functions. Please disable one or more of the following: Mouse Keys, Extra Keys, Raw HID, Console
      ^~~~~
tmk_core/protocol/vusb/vusb.c:81:6: error: #error Mouse/Extra Keys share an endpoint with Console. Please disable one of the two.
 #    error Mouse/Extra Keys share an endpoint with Console. Please disable one of the two.
      ^~~~~
 [ERRORS]


Tuesday, 9 November 2021

1x!Numpad documentation

 Design Notes

-


Tutorial to Remap keys

VIA 

1. Download VIA software here
 
win platform
 other platforms

2. Download json file below

3. Install VIA, click File, import keymap. Choose the json file you downloaded in step2
 
 
 4. You can now start remapping in VIA. You dont need to save, it reflects directly once you assign.


VIAL

1. Download VIAL software here

2. Start remap your keys, scroll wheel and rotary encoder. 
3. Json file is not required in VIAL.


below for advanced user

Firmware Downloads

20211110

Json download (to load it in VIA)
Hex download for backup
Files keymap download

- Ported with VIA and VIAL
- Programmable rotation for scroll wheel and rotary encoder through VIAL
- Enabled all rgb lighting
- Up to 5 layers configuration 
- Oleds inspired from Yampad (shows layer, stats such as num, cap, scr)
- Mousekey enabled
- QMK settings, tap dance, and combo are disabled in VIAL to save storage


20211213

 Hex download here
Check this link to see how to flash the board; remember to save your layout or keymap by SAVE+LOAD > Save Current Layout. Load this saved layout after you flash with the new hex above. Do note that this json file is different from "Json download to load in VIA" above. 

- removed "keep going", replaced with exclamation mark


Thursday, 28 October 2021

Treadstone48 and Rhymestone

 The following is the translation made by the author Marksard for the JIS mode. 


# The like jis type keyboard keymap for treadstone48

## Description

## How to use

# JISキーボードライクなキーマップ
#JIS keyboard-like keymap

## 概要
## Overview

 デフォルトキーマップの記号類をJISライクな配置に揃えなおしたものです。  
 オプションのRhymestone用のマップを使用するために拡張しています。RhymestoneのpromicroにもTreadstone48のキーマップを入れてください。  
 Rhymestoneは基本的には左手側を使うことを想定していますが、右手側を使用する場合はconfig.hの以下の行を有効にしてください。   

```#define RHYMESTONE_RIGHTHAND```

The symbols of the default keymap have been rearranged in a JIS-like layout.
Expanded to use the optional map for Rhymestone. Put the Treadstone 48 keymap in the Rhymestone pro micro as well.
Rhymestone basically assumes that the left hand side is used, but when using the right hand side, enable the following line in config.h.

`` `#define RHYMESTONE_RIGHTHAND```

## キーマップの見かた
## How to read the key map

qmk_firmware\tmk_core\common\keycode.h  
に基本的なキーコードがあります。また、Keymap.cの上部にカスタムしたKC_で始まるものを登録しています。  
キーマップに書くときは「KC_」を省略して書いています。
例:KC_A → A  

Leyer Tap、Mod Tap、Tap DanceというQMKの機能を使っています。  

Layer Tapはタップで指定したキー、長押しで指定したレイヤーに移動します。  
例:LT(RAISE, KC_V) → タップでV、長押しでRAISEレイヤー移動

Mod Tapはタップで視程したキー、長押しで視程したレイヤーに移動します。  
例:LSFT_T(KC_Z) → タップでZ、長押しで左シフト

もう少し詳しい内容についてはQMK Documentをお読みいただくかネットを検索すれば情報が載っていますので別途検索してみてください。  

qmk_firmware \ tmk_core \ common \ keycode.h
Has a basic key code in. Also, the ones starting with custom KC_ are registered at the top of Keymap.c.
When writing on the keymap, "KC_" is omitted.
Example: KC_A → A

I use QMK features such as Leyer Tap, Mod Tap, and Tap Dance.

Layer Tap moves to the specified key by tapping and the specified layer by long pressing.
Example: LT (RAISE, KC_V) → Tap to move V, long press to move RAISE layer

Mod Tap moves to the visible key with a tap and the visible layer with a long press.
Example: LSFT_T (KC_Z) → Tap to Z, long press to shift left

For more details, please read the QMK Document or search the internet for more information, so please search separately.

## 機能

 QWERTYキーマップをベースにしていて、LowerレイヤーとRaiseレイヤーに他のキーを配置しています。  
 LowerとRaiseを同時押しでAdjustレイヤーを使うことが出来ます。  
 マウスキーの割り当てがありますので、もし使用したい場合はrules.mkでMOUSEKEY_ENABLE = yesにしてmakeすると使用することができます。  

## 48キー目について

 このキーボードはEnterキーの上の2Uキーを1Ux2個にして使用する事が出来るようになっています。  使用する場合はキーマップの書き換えが必要です。  

 各レイヤーの最下段の

```c
      XXXXXXX \
  // ExtraKey: This key is an extra key. REV1 is a split back space. REV2 is to the right of the arrow-up key.
```

 のXXXXXに任意のキーを入れることでPの右隣のキーとして動作するようになっています。その右隣りに従来のキーが配置されています。  

## function

Based on the QWERTY keymap, other keys are placed on the Lower layer and Raise layer.
You can use the Adjust layer by pressing Lower and Raise at the same time.
There is a mouse key assignment, so if you want to use it, you can use it by setting MOUSEKEY_ENABLE = yes in rules.mk.

## About the 48th key

This keyboard can be used with 1Ux2 2U keys above the Enter key. If you want to use it, you need to rewrite the keymap.

At the bottom of each layer

`` `c
      XXXXXXX \
  // ExtraKey: This key is an extra key. REV1 is a split back space. REV2 is to the right of the arrow-up key.
`` ```

By putting an arbitrary key in XXXXX, it works as the key to the right of P. The conventional key is placed to the right of it.

## OS切り替え方法
## OS switching method

 Adjustレイヤーにあります。LowerとRaiseを同時押しでAdjustレイヤーを使うことが出来ます。  

- KNRM: QMKのノーマル状態です。macだと正常に使える(はず)です
- KSWP: ノーマル状態のままWindowsで使用するとALTキーとGUI(win)キーが逆ですので、それを入れ換えます。Windowsユーザーはこちらのモードにしてください

Located in the Adjust layer. You can use the Adjust layer by pressing Lower and Raise at the same time.

--KNRM: QMK is in the normal state. It can be used normally on a mac (should)
--KSWP: If you use it on Windows in the normal state, the ALT key and GUI (win) key are reversed, so replace them. Windows users should switch to this mode

## NUMPADモードについて
## About NUMPAD mode

 Lower + DLNPキーを一度押下するとNumpadモードになります。通常モードに戻す場合はDLBSキーを押下してください。  
Press the Lower + DLNP key once to enter Numpad mode. To return to normal mode, press the DLBS key.

## IME切り替え方法
## IME switching method

 Winの場合、LowerレイヤーにKANJIキー(半角/全角 漢字)がありますので、Lower+KANJIで切り替えてください。  

In the case of Win, there is a KANJI key (half-width / full-width kanji) in the Lower layer, so switch with Lower + KANJI.


## ソフトウェアリセットについて
## About software reset

 キーボードにはハードウェアのリセットボタンが付いていますが、ソフトウェアリセットをかけられます。  
 LowerとRaiseを同時押しでAdjustレイヤーを使うことが出来、AdjustレイヤーのRSTを押下するとリセットがかかります。  

The keyboard has a hardware reset button, but you can do a software reset.
The Adjust layer can be used by pressing Lower and Raise at the same time, and reset will be applied when the RST of the Adjust layer is pressed.

## LEDの点灯切り替え方法
## How to switch LED lighting

 Adjustレイヤーにあります。LowerとRaiseを同時押しでAdjustレイヤーを使うことが出来ます。  

- RGBRST: LEDのリセット
- RGB_TOG: LEDのON/OFF切り替え
- RGB_MOD: LEDの光り方の変更
- RGB_HUI: Hue+ 色合いを変更
- RGB_HUD: Hue- 色合いを変更
- RGB_SAI: Saturation+ 色の濃さを変更
- RGB_SAD: Saturation- 色の濃さを変更
- RGB_VAI: Value+ 明るさを変更
- RGB_VAD: Value- 明るさを変更

Located in the Adjust layer. You can use the Adjust layer by pressing Lower and Raise at the same time.

--RGBRST: LED reset
--RGB_TOG: LED ON / OFF switching
--RGB_MOD: Change of LED lighting
--RGB_HUI: Hue + change color
--RGB_HUD: Hue- Change hue
--RGB_SAI: Saturation + Change color depth
--RGB_SAD: Saturation-Change color saturation
--RGB_VAI: Value + Change brightness
--RGB_VAD: Value- Change brightness


Friday, 8 October 2021

Essential Compilation

 C:\Users\chino\qmk_firmware\vial-qmk\keyboards\sofle\keymaps\foureight85

1. Encoder update problem 

override to bool encoder_update_user(uint8_t index, bool clockwise) and adding a return true; at the end of the function work?

edit was able to successfully compile and flash the firmware after changing function definition in keymap.c

 //

encoder for media

Make sure that you have #define TAP_CODE_DELAY 10 in your config.h file, and then try.

2. Rotary for vial update here

https://get.vial.today/docs/encoders.html


3. Reducing firmware size of vial 

https://get.vial.today/docs/firmware-size.html

a.

To enable LTO, add the following line to your keymaps/vial/rules.mk:

LTO_ENABLE = yes

b. 

To turn off this feature, add the following line to your keymaps/vial/rules.mk:

QMK_SETTINGS = no

c.

To reduce RAM and EEPROM usage, you can define the following in your config.h: #define VIAL_COMBO_ENTRIES 4.

To turn off this feature, add the following line to your keymaps/vial/rules.mk:

COMBO_ENABLE = no
TAP_DANCE_ENABLE = no 

d.

If you are running out of EEPROM, you can reduce the number of dynamic keymap layers. The default layer count is 4. To reduce it, define in your config.h file:

#define DYNAMIC_KEYMAP_LAYER_COUNT 2


e. 

// Reduce firmware size suggested by Drashna; however did not do so if console already disabled in rules
// CONSOLE_ENABLE = no         # Console for debug
    #ifndef NO_DEBUG
    #define NO_DEBUG
    #endif // !NO_DEBUG
    #if !defined(NO_PRINT) && !defined(CONSOLE_ENABLE)
    #define NO_PRINT
    #endif // !NO_PRINT


4. From via to vial

a. keymaps/via/rules.mk

VIAL_ENABLE = yes
VIAL_INSECURE = yes
VIAL_ENCODERS_ENABLE = yes

      
b. via.json change to vial.json, store in keymaps/via/
 
c. vial-qmk run 
 python3 util/vial_generate_keyboard_uid.py
 
d. copy the id add to define under config.h
 #define VIAL_KEYBOARD_UID


5. RGB lighting effects

https://beta.docs.qmk.fm/using-qmk/hardware-features/lighting/feature_rgblight

config.h

#define RGB_DI_PIN D3
#ifdef RGB_DI_PIN
  #define RGBLED_NUM 11
  #define RGBLIGHT_HUE_STEP 16
  #define RGBLIGHT_SAT_STEP 16
  #define RGBLIGHT_VAL_STEP 16
  #define RGBLIGHT_LIMIT_VAL 255 /* The maximum brightness level */
  #define RGBLIGHT_SLEEP  /* If defined, the RGB lighting will be switched off when the host goes to sleep */
// /*== all animations enable ==*/
//  #define RGBLIGHT_ANIMATIONS     #delete to reduce memory
// /*== or choose animations ==*/
//   #define RGBLIGHT_EFFECT_BREATHING
//   #define RGBLIGHT_EFFECT_RAINBOW_MOOD
   #define RGBLIGHT_EFFECT_RAINBOW_SWIRL   
//   #define RGBLIGHT_EFFECT_SNAKE
//   #define RGBLIGHT_EFFECT_KNIGHT
//   #define RGBLIGHT_EFFECT_CHRISTMAS
   #define RGBLIGHT_EFFECT_STATIC_GRADIENT
//   #define RGBLIGHT_EFFECT_RGB_TEST
//   #define RGBLIGHT_EFFECT_ALTERNATING
// /*== customize breathing effect ==*/
//   /*==== (DEFAULT) use fixed table instead of exp() and sin() ====*/
//   #define RGBLIGHT_BREATHE_TABLE_SIZE 256      // 256(default) or 128 or 64
//   /*==== use exp() and sin() ====*/
//   #define RGBLIGHT_EFFECT_BREATHE_CENTER 1.85  // 1 to 2.7
//   #define RGBLIGHT_EFFECT_BREATHE_MAX    255   // 0 to 255
#endif


Kicad and EDA

1. Pack rar from Kicad for pcb submission

(ZIP)


2. From Kicad to EDA

https://docs.easyeda.com/en/Import/Import-KiCAD/index.html

If you only want to import the PCB, you just need to ZIP the PCB file and then import it.


Split usb type c port

- USBLC6-2SC6 (for electro-static), then connecting to PinSocket_1x04_P2.54mm_Vertical (j6)

- USB_C_Receptacle_HRO_TYPE-C-31-M-12 (separated usb type c port)

- 2 resistors 5.1k, connecting to u2 (electro-static)


If split with left and right matrix L01, R01


/*follow for gaming*/
#define USB_POLLING_INTERVAL_MS 1
#define QMK_KEYS_PER_SCAN 12